Monday, November 28, 2011

Pesto Turkey Squares


I made this last night with our leftover turkey and it was so good! 

Prep Time: 10 Min
Total Time: 30 Min
Makes: 8 servings

http://www.pillsbury.com/recipes/pesto-turkey-squares/02464c22-1880-4d7f-945c-4edacb091768/

INGREDIENTS


       1 can (8 oz) Pillsbury® refrigerated crescent dinner rolls 


1/4
cup basil pesto
1/2
cup cubed cooked turkey
1 1/4
cups shredded Italian cheese blend (5 oz)
2
medium plum (Roma) tomatoes, thinly sliced


DIRECTIONS


1Unroll dough and place in greased 12x8-inch (2-quart) glass baking dish; press over bottom and 1/2 inch up sides of pan to form crust (if using crescent rolls, press perforations to seal).2Spread pesto evenly over crust. Top with turkey, 1 cup of the cheese, the tomato slices and remaining 1/4 cup cheese.3Bake at 375°F 12 to 15 minutes.

Wednesday, August 3, 2011

Breakfast Casserole


Bag of shredded hash brown potatoes
2 cans cream of mushroom soup
1/2 c. milk
8 eggs
2 c. shredded cheddar cheese
1 lb sausage, browned & crumbled
¼ c. dried onions, opt
Salt , pepper
Preheat oven to 350. Spray a 13 X 9 pan with non stick spray.
Brown sausage & let cool a few mins. With my mini chopper I put sausage in a little at a time, pulse a few times to get sausage a little less clumpy. I brown sausage the night before, but whole casserole can be made up night before and baked in morning.
Layer 2/3 of the bag of shredded hash browns in 13 X 9 pan. Sprinkle onion flakes, salt, pepper. Add browned sausage. 
Mix together: 2 cans of soup, milk, cheese, eggs. Pour over hash brown / sausage mixture. I use a fork and pull up hash browns so liquid mixture gets mixed in good with potatoes and sausage. 
Bake 45 min to 1 hour. it is done when you stick a knife in it and it comes out clean.

Monday, July 4, 2011

Burlap & Denim Ruffled Patriotic Wreath

Burlap & Denim Ruffled Patriotic Wreath


I saw this and think this maybe in my future...I can adjust it for any holiday! Here are the instructions in case you are interested.

I started with a wreath form, some red satin ribbon, and my trusty Beacon's 3-in-1 adhesive.

I wrapped the wreath form with the ribbon because I wasn't sure how well the burlap would cover the wreath. Luckily it would not end up being a problem...

Because I ran out of ribbon thus the gap in the above picture.

Next step: Gather my fabrics!

I could have sworn I owned some red burlap. But apparently I imagined that!
So I spray painted some white burlap I had on hand, and it worked like a dream.
Love it when that works out!

I cut my new red burlap and more of the white burlap into strips. Then I hand-stitched crochet thread through the top of each strip to make ruffles.

I glued the ruffles to the back of the wreath, layering the white and red.

Then I started wrapping the ruffles around the wreath. When I would get to the end of a strip of ruffles I would glue on another one. I wrapped about 3/4 of the wreath this way. I think I ended up using 5 strips of red and 6 of white.

I repeated the ruffling technique with the denim material and proceeded to wrap the rest of the wreath.

I'm loving all of those ruffles! But something is missing...

I need some "stars" for my denim so it's time to break out the button stash!

I glued various sized buttons randomly to the denim ruffles.

Now its complete!


Wednesday, June 29, 2011

Peach, Mozzarella, and Basil Salad | Real Simple Recipes

Peach, Mozzarella, and Basil Salad | Real Simple Recipes


Ingredients

Directions

  1. Cut each peach into 6 to 8 wedges, then cut each wedge in half crosswise.
  2. In a large bowl, combine the peaches, basil, and mozzarella. Drizzle with the oil, sprinkle with the salt and pepper, and toss. (You can cover and refrigerate the salad for up to several hours.) Serve cold or at room temperature.

Friday, May 20, 2011

Pancake Art

I have been wanting to try this for months and just now am trying it. I am going to attempt Watermelon Pancakes!!! The directions are a little extensive but it is VERY simple. Thanks Jenni Price for the inspiration! http://jennipriceillustration.blogspot.com/


image
Griddle or large skillet
Pam Cooking Spray
Large mixing bowl
Water
Krusteaz Buttermilk Pancake Mix (the just add water mix)
Electric mixer
Three Condiment Squirt Bottles (can be found at Walmart)
red and green food coloring
Paper Towels
Spatula
Spoons for mixing
Miniature chocolate chips
Measuring Cup
Toothpicks
Mixing cups
image
Get out your large bowl and stir with a spoon 1 cup plus 2 Tbsp of pancake mix with ¾ cup of water.
You want your batter thick enough to “draw” with but not too much where it won’t squeeze out of the
squirt bottle (you can add more pancake mix if it's too runny). Grab your electric mixer and stir until
it's well blended. If you have too many lumps, they will clog up your squirt bottle. Divide up your
batter into three bowls. Refer to the above squirt bottle graphic for a rough idea on how much pancake
batter should be in each squirt bottle. I didnt use as much as they said to use for the food coloring. The green color needs 6 drops of food coloring, the red needs 13
drops of food coloring and the white doesn't have any coloring in it. Pour the batter slowly into the
squirt bottles making sure to keep paper towels handy for any drips.
image
Spray your griddle with cooking spray but do not turn it on yet. Keep toothpicks nearby to release any
clogs in the squirt bottles.

Step One: For the wide slice, draw the Watermelon rind with the green batter. Because these are so
small, I suggest making several of them at the same time.

Step Two: Draw a second watermelon rind line with the white batter.

Step Three: Draw the watermelon top with the red batter.
image
Step Four: For the watermelon wedge, draw the rind with the green batter. Again, since these are so
small, I suggest making several of them at the same time.

Step Five: Draw a second rind line with the white batter.

Step Six: Complete the watermelon wedge shape with the red batter.
image
Step Seven and Eight: Turn on your griddle to the lowest heat setting (about 200 degrees) and let
the outlines cook. Wait until they seemed puffed up before continuing. These cooked outlines keep the
batter from spreading out so that the shape stays in place. Now turn off your griddle.

Step Nine:
Fill in the wedge with the red batter. Turn your griddle back on to 200 degrees and wait
to flip it until the pancake looks bubbly and loses most of it's shine.
Step Ten: Fill in the watermelon wide slice with the red batter and wait to flip it until the batter is
bubbly and looks mostly cooked. If you plan on making more watermelons, turn off your griddle and
start at step one again but wipe down your griddle with a paper towel and re-spray your griddle with
cooking spray when it has cooled slightly.

Step Eleven : Let the mini watermelons cool a little bit then decorate with mini chocolate chips.

These are mine!!!

Wednesday, May 18, 2011

Mickey Mouse Pinata

So for Liams 1st Birthday I had thought about doing a Mickey theme but then decided on a Jungle theme instead. When I was throwing ideas around I made this Mickey Pinata. Now it is hanging above Liams bed instead! Here is how to make it!!
 
What I used:
A Costco sized Huggies box.
tape
craft glue
a roll of crepe paper
a couple sheets of tissue paper
tape
 
I started by cutting out the mouse ears shape. I used bowls for my drawing. You'll need two sets of ears, a front and a back.

Next I cut the flaps from the top and bottom of the box in half lengthwise. I took the strips and made them pliable by bending them and rubbing them along the edge of the table. It's kinda like curly ribbon. You just have to break the stiffness so you can bend it around the shape of the ears.
I attached the strips one side at a time. I started at the center corner of one ear and taped it into place. Then running along the edge I would place a piece of tape every now and then. You don't want to tape the whole thing or they won't be able to break it open, use just enough to hold it in place. I continued this until I wrapped around the whole thing. Taping in all the corners help it hold it's shape.

I turned it over and attached the other side the same way.

I left this gap in the top so I could fill it with candy.

I didn't get a picture, but at this point I would poke a hole in the front and back to fish your wire through. Once you've added the wire you can cover the box with paper.

I started at the edges. I ran lines of glue along the edges on both the top and side of the pinata. Next I covered them up with the crepe paper.

I did this on both sides

Then I covered the entire thing with a layer of black tissue paper. I glued it down and cut away the excess.

I covered the tissue paper with spirals of ruffled crepe paper. I started with the ears first.

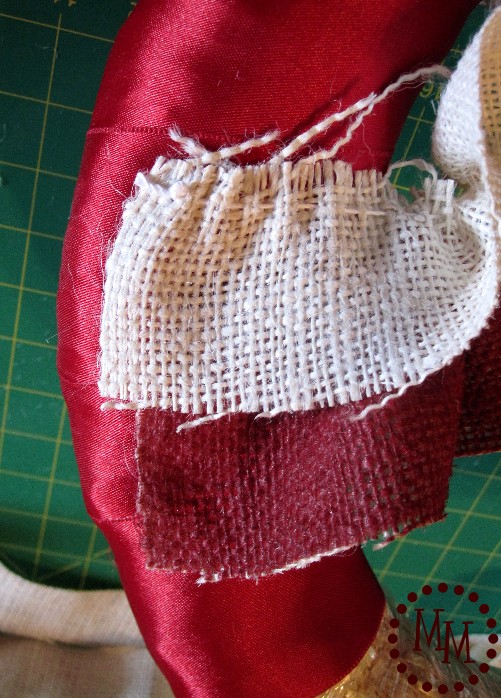
First I went around the edge with the glue. Then I pulled the crepe paper into gathers as I layed it down. I would lay it in the glue and scrunch it up.

Once the outer layer was done I would start on the next layer making sure they overlapped a little.

 
After the ears were done, I did the same thing for the center. I covered both the front and back and sides with the crepe paper gathers.
For the sides I did the edges first then did a ruffle down the middle.
The only thing left to do is add a bow...or not depending if you want Mickey or Minnie, it can be used to hide the wire.

For the middle of the circle I scrunched a strip of the crepe paper into gathers and formed it into a circle and attached it to the center.
Related Posts Plugin for WordPress, Blogger...